
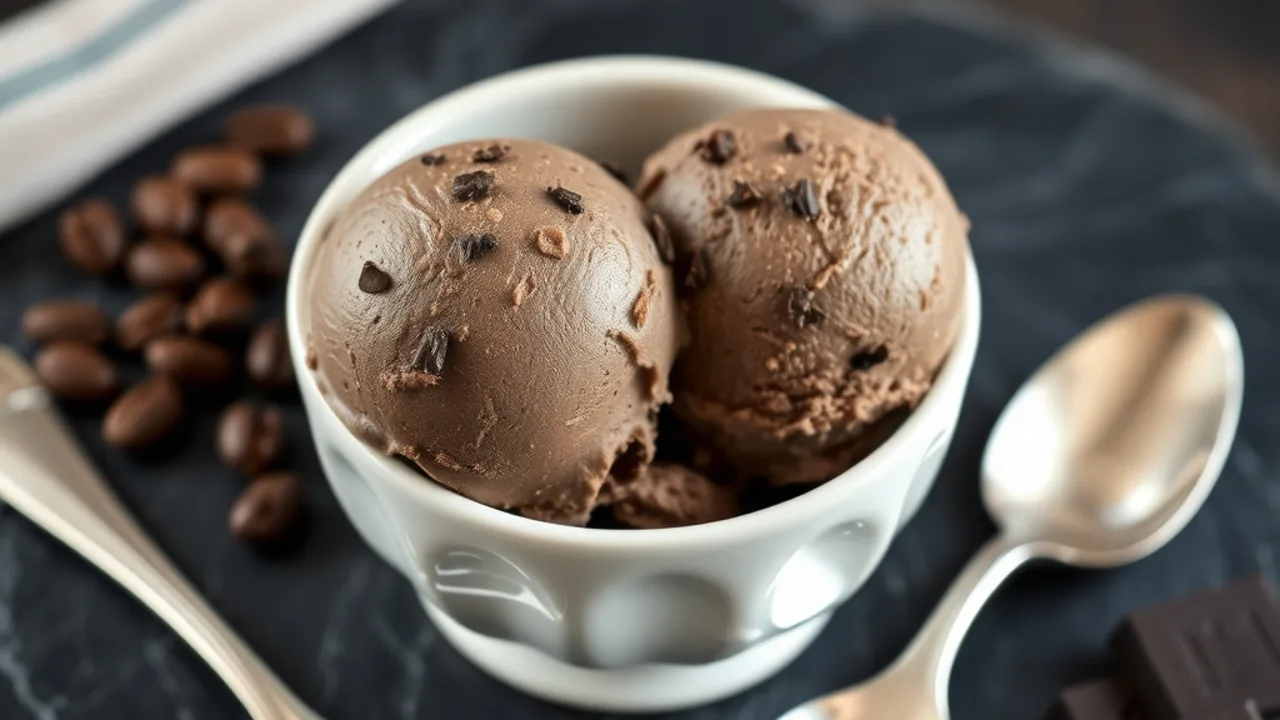
When bold roasted espresso meets rich, velvety cocoa, the result is pure dessert magic. This homemade chocolate coffee ice cream delivers the ultimate mocha experience without needing an expensive countertop machine or hours spent cooking an egg custard base. With just a handful of everyday ingredients and a simple whisking technique, you can create a scoopable, decadent treat that rivals any artisanal creamery.
Why You Will Love This Chocolate Coffee Ice Cream
Many traditional custard-based ice creams require careful tempering of egg yolks, constant temperature monitoring, and a specialized churning appliance. While that method yields wonderful results, it can feel daunting on a busy afternoon. This recipe uses a reliable no-churn method anchored by heavy whipping cream and sweetened condensed milk.
Here is why this combination works so exceptionally well:
- Rich mocha balance: The natural bitterness of espresso rounds out the sweetness of condensed milk, keeping every bite complex rather than cloying.
- Silky, scoopable texture: The high fat content in heavy cream prevents large ice crystals from forming during freezing.
- No specialized equipment: A handheld electric mixer or stand mixer is all you need to whip air into the base.
- Quick preparation: The entire mixture comes together in roughly fifteen minutes before going into the freezer.
If you adore cold coffee confections, this dessert brings the same satisfying energy as a glass of Vietnamese iced coffee transformed into a frozen scoop.
Ingredients You Will Need
Quality ingredients make a tangible difference when preparing simple frozen desserts. Here is what you will need to prepare a standard two-quart batch:
- Heavy Whipping Cream (2 cups / 480 ml): Ensure your cream is thoroughly chilled before whipping to achieve stable, airy peaks.
- Sweetened Condensed Milk (1 can, 14 oz / 396 g): This provides sweetness and keeps the base soft enough to scoop without churning.
- Unsweetened Dutch-Processed Cocoa Powder (1/3 cup / 35 g): Dutch-process cocoa offers a darker color and milder acidity that blends seamlessly with coffee. According to culinary standards documented by the Michigan State University Extension, alkalized or Dutch cocoa dissolves smoothly and yields a less astringent chocolate profile in cold applications.
- Instant Espresso Powder (2 tablespoons): Concentrated espresso granules dissolve readily in liquid and deliver an authentic coffee punch without thinning the batter.
- Pure Vanilla Extract (1 teaspoon): Vanilla deepens the aromatic notes of both chocolate and roasted coffee.
- Fine Sea Salt (1/4 teaspoon): A pinch of salt balances sweetness and sharpens the cocoa flavor.
- Optional Mix-ins (1/2 cup): Finely chopped dark chocolate chunks, chocolate-covered espresso beans, or mini chocolate chips for added crunch.
Equipment Required
You likely already have everything necessary in your kitchen:
- Standard 9x5-inch metal loaf pan (or an airtight, freezer-safe container)
- Electric hand mixer or stand mixer fitted with a whisk attachment
- Large mixing bowl (chilling it beforehand helps cream whip faster)
- Silicone spatula for gentle folding
- Plastic wrap or parchment paper
Step-by-Step Instructions
Step 1: Dissolve the Coffee and Cocoa
In a medium mixing bowl, pour in the entire can of sweetened condensed milk. Sift in the Dutch-processed cocoa powder and instant espresso powder to eliminate any stubborn lumps. Add the pure vanilla extract and fine sea salt. Whisk everything thoroughly until the mixture is glossy, dark, and completely smooth. Set this rich chocolate-coffee base aside at room temperature.
Step 2: Whip the Cream to Stiff Peaks
In a separate chilled bowl, pour in the cold heavy whipping cream. Using your electric mixer on medium-high speed, whip the cream until stiff peaks form. You will know it is ready when you lift the beaters and the peaks stand tall without slumping. Be careful not to overwhip, as cream can quickly turn grainy and separate into butter.
Step 3: Lighten and Fold
Take approximately one cup of your whipped cream and gently whisk it directly into the condensed milk mixture. This lightens the dense chocolate base, making the remaining folding process much easier. Next, scrape the chocolate mixture into the large bowl containing the rest of the whipped cream. Using a flexible silicone spatula, fold the two mixtures together using broad, gentle sweeps from the bottom of the bowl upward. Work patiently until no white streaks remain, keeping as much incorporated air as possible.
Step 4: Incorporate Mix-ins
If you enjoy textural contrast, scatter your chopped dark chocolate chunks or mini chips over the surface and give the batter two or three gentle folds to distribute them evenly.
Step 5: Freeze Until Firm
Pour the mixture into your loaf pan, smoothing the top with your spatula. Press a sheet of wax paper or parchment directly against the surface of the cream; this barrier minimizes contact with air and protects against surface crystallization. Cover the top tightly with foil or a lid and freeze for at least 6 hours, or ideally overnight, until solid.
Tips for the Best Texture and Flavor
Making frozen desserts at home is straightforward, but keeping a few practical tips in mind will guarantee bakery-level results every time:
- Keep dairy ice-cold: Warm cream will not trap air efficiently. Keep your carton in the coldest part of your refrigerator until the exact moment you pour it out.
- Control the coffee intensity: If you prefer a subtle mocha hint, reduce the espresso powder to 1 tablespoon. For a pronounced java punch reminiscent of a rich cold brew coffee, increase it to 2.5 tablespoons.
- Avoid liquid coffee substitutes: Do not swap instant espresso powder for brewed liquid coffee. Adding extra water-based liquid introduces ice crystals, which ruins the silky texture of no-churn ice cream. If you only have liquid concentrate, reduce the amount drastically and whisk it directly into the condensed milk.
- Softening before serving: Because homemade ice cream does not contain commercial stabilizers, allow the container to rest on the counter for 5 to 7 minutes before scooping.
Delicious Flavor Variations
You can easily customize this chocolate coffee ice cream recipe to match your favorite café beverages:
- Toffee Crunch Mocha: Fold in 1/2 cup of crushed toffee bits during the final fold for buttery crunch.
- Cinnamon Mexican Mocha: Add 1/2 teaspoon of ground cinnamon and a tiny pinch of cayenne pepper to the cocoa base.
- Fudge Swirl: Warm your favorite chocolate fudge sauce slightly, then drizzle it in layers as you spoon the ice cream into the freezing pan. Swirl gently with a butter knife.
- Decaf Version: Simply use decaffeinated instant espresso granules to enjoy this dessert late in the evening without sleep disruption.
Serving Suggestions
Presenting this ice cream can be as simple or elaborate as you like. A single scoop served inside a warm waffle cone is a classic choice, but pairing it with complementary treats creates an unforgettable dessert course.
For a coffeehouse presentation, place two generous scoops in a glass bowl and top them with freshly prepared homemade whipped cream and a dusting of cocoa powder. You can also turn it into an Italian-style affogato by pouring a hot shot of fresh espresso directly over a scoop right before serving.
If you are planning a dessert platter for guests, serve small scoops alongside lemon crinkle cookies or warm brownies to give your guests an exciting contrast of temperatures and textures. If you enjoy quick sweet treats, explore other easy chocolate dessert recipes to build a varied party menu.
Proper Storage Instructions
Proper storage ensures your ice cream maintains its velvety texture without absorbing lingering odors from the freezer:
- Airtight seal: Always keep the surface covered with parchment paper or plastic wrap, pressing it flat against the ice cream before securing the container's outer lid. Guidelines from the FoodSafety.gov freezer storage guide emphasize keeping frozen foods tightly sealed to prevent moisture loss and freezer burn.
- Freezer placement: Store the container toward the back or center of the freezer shelf rather than in the door, where temperature fluctuations occur every time the door opens.
- Shelf life: While commercial varieties last for months due to preservatives, this all-natural homemade recipe is best enjoyed within 2 to 3 weeks for optimal flavor and texture.
Frequently Asked Questions
Can I make this recipe dairy-free?
Yes. You can substitute chilled full-fat coconut cream (chilled overnight and whipped) in place of the heavy whipping cream, along with sweetened condensed coconut milk. The ice cream will possess a mild coconut undertone that pairs naturally with chocolate and coffee.
What is the difference between instant coffee and espresso powder?
Espresso powder is made from darkly roasted coffee beans that have been brewed, dried, and ground into very fine crystals. It dissolves instantly and provides a more concentrated, robust flavor than standard instant coffee granules, which are typically lighter and milder.
Why did my ice cream turn out icy instead of creamy?
Iciness generally happens if the cream was under-whipped, if liquid coffee was introduced into the base, or if the container was left uncovered in the freezer. Whipping the heavy cream to firm peaks traps microscopic air pockets that guarantee a velvety scoop.
Does this ice cream contain caffeine?
Yes, standard instant espresso powder contains caffeine. Two tablespoons spread across eight servings yields a modest amount per serving (roughly comparable to a quarter-cup of brewed coffee). If you are sensitive to stimulants or serving children, simply use decaffeinated espresso powder.


