
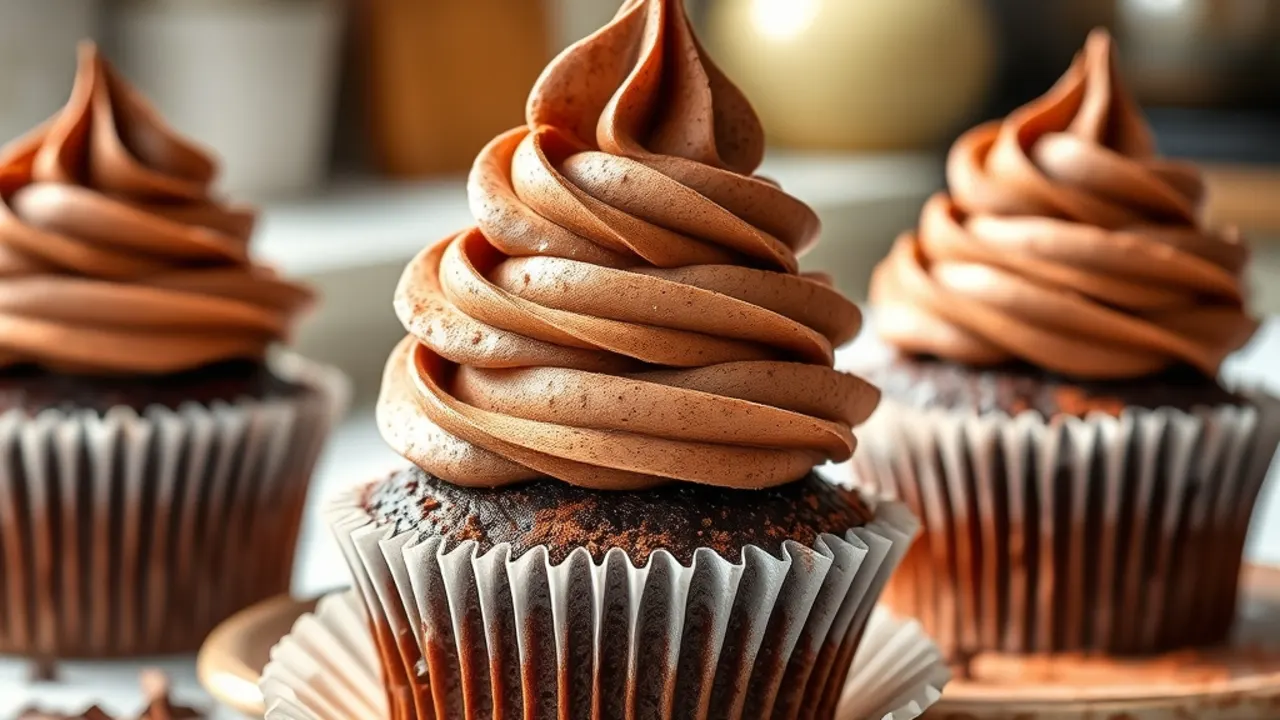
A dependable, tender cocoa cupcakes recipe is an essential secret weapon in any baker’s kitchen. When a chocolate craving strikes, you do not need melting chocolate bars, complex tempering setups, or fancy specialty tools. With pantry staples and a good tub of cocoa powder, you can produce cupcakes that are intensely rich, ultra-moist, and crown-worthy for any celebration or casual afternoon sweet tooth.
The magic of cocoa-based baking lies in how cocoa powder interacts with liquid and fat. Unlike melted chocolate, which introduces solid cocoa butter that firms up as the cake cools, unsweetened cocoa powder allows for the use of vegetable oil and cultured buttermilk. The result is a sponge that stays remarkably springy and moist for days, rivaling any bakery showcase. If you love discovering easy chocolate dessert recipes, this classic cupcake will quickly become your go-to standard.
The Secret to Intensely Flavorful Cocoa Cupcakes
Cocoa powder alone can occasionally taste flat or powdery if treated improperly. Professional pastry chefs rely on a simple technique known as blooming. When hot liquid—such as boiling water or freshly brewed hot coffee—meets dry cocoa powder, it dissolves the powder particles, releases trapped aromatic compounds, and intensifies the chocolate notes.
Do not worry if you are baking for kids or do not like coffee flavor: hot coffee does not make the cupcakes taste like mocha. Instead, the acidity and subtle roasted bitterness of coffee enhance the earthy depth of the cocoa bean. If you prefer to skip coffee entirely, boiling water or hot milk works seamlessly.
Natural Cocoa vs. Dutch-Process Cocoa: Which Should You Use?
Understanding cocoa chemistry makes all the difference in achieving the right lift and texture:
- Natural Unsweetened Cocoa Powder: Highly acidic, sharp, fruity, and light reddish-brown in color. It reacts with baking soda to create chemical leavening, giving cupcakes a lofty, light crumb.
- Dutch-Process (Alkalized) Cocoa: Washed in an alkaline solution to neutralize natural acidity. It produces a darker color, mellow flavor, and dissolves easily. For a deeper scientific breakdown on how alkalization affects crumb structure and pH, explore Serious Eats’ guide to cocoa powders.
This recipe balances natural acidity with baking soda and baking powder, meaning you can comfortably use standard natural unsweetened cocoa (such as Hershey’s) or Dutch-process cocoa (such as Rodelle or Droste) without sacrificing rise.
Equipment and Ingredient Checklist
You do not need an electric stand mixer to make the batter; two bowls, a wire whisk, and a rubber spatula are all that stand between you and fresh warm cupcakes.
For the Cupcake Batter
- 1 cup (125g) all-purpose flour: Spooned and leveled to prevent a dense crumb.
- 1 cup (200g) granulated sugar: Sweetens and retains moisture.
- 1/2 cup (45g) unsweetened cocoa powder: Sifted to eliminate stubborn clumps.
- 1 teaspoon baking powder: Provides initial lift.
- 1/2 teaspoon baking soda: Reacts with cocoa and buttermilk for an airy crumb.
- 1/2 teaspoon fine sea salt: Enhances the chocolate richness.
- 1 large egg: At room temperature for effortless emulsification.
- 1/2 cup (120ml) buttermilk or whole milk: At room temperature (buttermilk adds exceptional tenderness).
- 1/4 cup (60ml) neutral vegetable oil or melted coconut oil: Ensures lasting moisture.
- 1 1/2 teaspoons pure vanilla extract: Rounds out bitter undertones.
- 1/2 cup (120ml) hot freshly brewed coffee or boiling water: To bloom the cocoa.
For the Classic Chocolate Buttercream Frosting
- 1/2 cup (115g) unsalted butter: Softened to room temperature.
- 1/3 cup (30g) unsweetened cocoa powder: Sifted.
- 2 cups (240g) powdered sugar: Sifted for cloud-like smoothness.
- 3 tablespoons heavy whipping cream or whole milk: For spreadable fluffiness.
- 1 teaspoon pure vanilla extract: For aromatic balance.
- Pinch of fine salt: To cut the confectioners’ sweetness.
Step-by-Step Instructions
Step 1: Prep the Oven and Pan
Preheat your oven to 350°F (175°C). Line a standard 12-cup muffin tin with paper cupcake liners. Proper pan preparation ensures clean releases and uniform baking.
Step 2: Whisk the Dry Ingredients
In a large mixing bowl, sift together the flour, sugar, cocoa powder, baking powder, baking soda, and salt. Whisk vigorously for 30 seconds to distribute the leavening agents evenly.
Step 3: Combine the Wet Ingredients
In a medium bowl or glass measuring pitcher, whisk together the egg, buttermilk, oil, and vanilla extract until uniform.
Step 4: Form the Batter
Pour the wet mixture into the dry ingredients. Whisk gently until just combined. Next, slowly stream in the hot coffee or boiling water while continuing to whisk. The batter will look thin and liquid—this is precisely what guarantees a tender, light texture. Scrape the sides and bottom of the bowl with a rubber spatula to catch stray pockets of flour.
Step 5: Fill and Bake
Divide the batter evenly among the 12 cupcake liners, filling each roughly two-thirds full. Avoid overfilling, which causes mushrooming crowns that sink upon cooling. Transfer to the center rack of your preheated oven and bake for 17 to 19 minutes. A wooden toothpick inserted into the center should come out clean or with a few moist crumbs attached.
Step 6: Cool Completely
Allow the cupcakes to rest in the pan for 5 minutes, then transfer them to a wire cooling rack. Cool completely to room temperature before frosting—warm cupcakes will melt your buttercream immediately.
Step 7: Whip the Chocolate Frosting
While the cupcakes cool, beat the softened butter in a medium bowl using an electric hand mixer for 2 minutes until creamy. Add the sifted cocoa powder and salt, beating on low speed until combined. Gradually add powdered sugar alternating with tablespoons of cream and vanilla extract. Once incorporated, beat on medium-high speed for 2 full minutes until fluffy and light. Pipe or swirl generously over the cooled cupcakes.
Baker’s Tips for Cupcake Perfection
- Sift your cocoa powder: Cocoa is notorious for compacting into stubborn little pebbles that do not dissolve easily in batter. Sifting guarantees a smooth mixture.
- Do not overmix: As soon as the flour is moistened, stop beating. Excess agitation develops gluten, turning delicate cupcakes chewy and bread-like.
- Temperature check: Room temperature eggs and dairy blend together smoothly, holding air pockets that assist in the rise.
- Want extra decadence? Top your cupcakes with a swirl of fresh homemade whipped cream alongside chocolate curls, or pair with a rich slice of easy vanilla pudding poke cake for dessert tables.
Serving and Drink Pairings
Rich cocoa cupcakes are wonderfully versatile. Serve them at birthday parties, wrap them for school lunchbox treats, or plate them after a celebratory family dinner. Because cocoa offers deep, roasted notes, these cupcakes pair exquisitely with specialty beverages:
- Afternoon pick-me-up: Sip alongside a refreshing iced vanilla latte at home or a glass of chilled cold brew to balance the rich buttercream.
- Cozy evening treat: Double down on comfort by serving these cupcakes with a steaming mug of easy hot chocolate in 5 minutes.
- Party mocktail match: Complement the cocoa notes with a bright, fruity spritzer from our favorite easy pomegranate mocktail recipe.
Storage, Freezing, and Make-Ahead Instructions
Proper storage keeps your cupcakes as moist as the day they were baked:
- Room Temperature: Frosted cupcakes can stay at room temperature in an airtight container for up to 3 days. If your kitchen is especially warm, chill them to keep the buttercream firm.
- Refrigerator: Stored in an airtight container, cupcakes keep fresh for up to 5 days. Let chilled cupcakes sit on the counter for 20 minutes before serving to soften the butter in the frosting.
- Freezing: Unfrosted cupcake bases freeze exceptionally well for up to 3 months. Wrap each cooled cupcake in plastic wrap, place in a freezer-safe zip-top bag, and thaw overnight in the refrigerator before decorating. For general household food storage and freezing guidelines, refer to the USDA Food Safety and Inspection Service.
Frequently Asked Questions
Can I make these cupcakes vegan or dairy-free?
Yes. Replace the buttermilk with soy milk or almond milk mixed with 1/2 teaspoon of apple cider vinegar, and substitute the egg with 1/4 cup of unsweetened applesauce. For the frosting, choose a quality dairy-free plant butter and canned coconut cream.
Why did my cupcakes sink in the center?
Cupcakes typically collapse if the oven door was opened prematurely, if the baking powder or soda was expired, or if the tins were overfilled. Keep your oven door closed during the first 14 minutes of baking to keep internal heat steady.
Can I turn this recipe into a 2-layer cake?
This exact batter doubles smoothly. A double batch yields enough batter for two 8-inch or 9-inch round cake pans. Bake at 350°F (175°C) for approximately 28 to 32 minutes until a tester comes out clean.


