
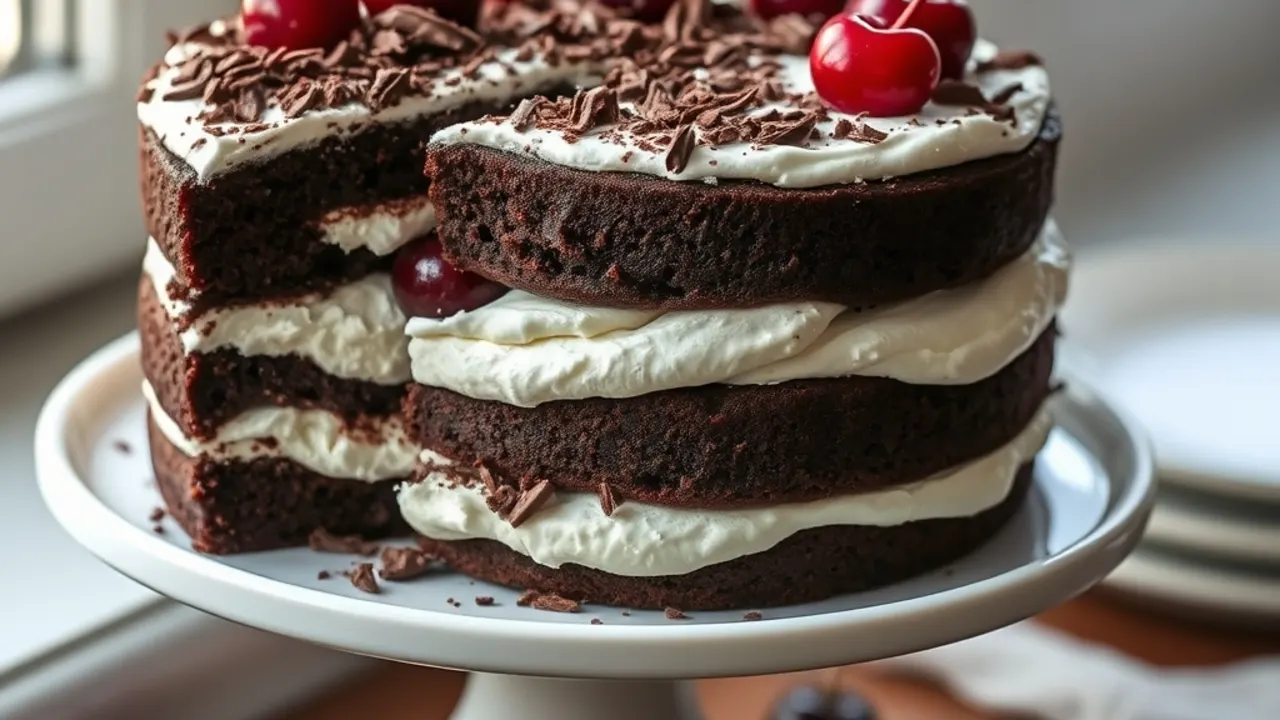
A classic chocolate forest cake brings together airy chocolate sponge layers, tart cherries, and clouds of fresh whipped cream. This timeless dessert delivers the deep cocoa flavor everyone loves without feeling heavy or overly sweet.
Looking for the quick answer on how to make it? Bake a light cocoa sponge cake, cool it completely, brush the layers with cherry syrup, and stack them with sweetened whipped cream and pitted cherries. Top the cake with dark chocolate shavings and chill it for at least two hours before slicing for clean, beautiful bakery cuts.
In This Article
What Is a Chocolate Forest Cake?
Originating from the traditional German Schwarzwälder Kirschtorte, this dessert is famous worldwide for its dramatic look and balanced taste. Traditional versions often use Kirsch, a clear sour-cherry brandy from the Black Forest region. However, modern home bakers frequently make non-alcoholic versions using sweet cherry juice or simple syrup so the whole family can enjoy a slice.
Unlike dense fudge bakes like our Matilda chocolate cake recipe, a chocolate forest cake relies on a whipped European-style sponge. Whipping whole eggs with sugar creates tiny air pockets that lift the cake. This light crumb easily drinks up cherry syrup, keeping each bite moist without collapsing under layers of whipped cream.
Key Ingredients You Need
You can find everything required for this recipe in regular grocery stores. Using high-quality ingredients ensures rich bakery flavor.
- Eggs: Four large eggs at room temperature. Room temperature eggs whip to greater volume than cold eggs.
- Granulated Sugar: 3/4 cup (150g) to sweeten the sponge and stabilize the beaten eggs.
- All-Purpose Flour: 3/4 cup (95g), sifted to keep the batter lump-free.
- Dutch-Processed Cocoa Powder: 1/3 cup (35g). Dutch cocoa offers a darker color and a smooth, mellow chocolate flavor.
- Baking Powder and Salt: 1 teaspoon baking powder for gentle lift and 1/4 teaspoon fine salt to balance the sweetness.
- Vanilla Extract: 1 teaspoon pure vanilla extract.
- Heavy Whipping Cream: 2 cups (480ml), chilled cold so it whips firmly.
- Powdered Sugar: 1/3 cup (40g) to lightly sweeten and stabilize the cream.
- Cherries: One 14-ounce (400g) can of pitted sour cherries or dark sweet cherries packed in juice, drained with juice reserved.
- Dark Chocolate: 3 ounces (85g) of bittersweet chocolate bar, shaved with a vegetable peeler.
Step-by-Step Baking and Assembly Guide
Baking this cake is simple when broken down into three straightforward stages: the sponge, the filling, and assembly.
Step 1: Bake the Chocolate Sponge
- Preheat your oven to 350°F (175°C). Grease two 8-inch round cake pans and line the bottoms with parchment paper rounds.
- In a large mixing bowl, beat the eggs and granulated sugar with a hand mixer or stand mixer on high speed for 6 to 8 minutes. The mixture should look pale yellow, thick, and fall in ribbons when you lift the beaters. Beat in the vanilla extract.
- In a separate bowl, whisk together the flour, cocoa powder, baking powder, and salt. Sift half of the dry mixture into the egg foam.
- Gently fold using a rubber spatula with slow, circular motions from the bottom of the bowl upward. Add the remaining dry ingredients and fold just until no flour streaks remain. Do not overmix, or the batter will deflate.
- Divide the batter evenly between your prepared pans. Bake for 18 to 22 minutes, or until the center springs back lightly when pressed with a fingertip.
- Let the pans cool on a wire rack for 10 minutes. Run a thin knife along the edges, turn the cakes out onto the rack, peel off the parchment paper, and let them cool completely to room temperature.
Step 2: Prepare the Cream and Cherry Syrup
- Measure 1/2 cup of reserved cherry juice into a small cup. If your cherries were packed in water rather than sweetened juice, stir in 1 tablespoon of sugar until dissolved.
- Pour cold heavy cream and powdered sugar into a chilled mixing bowl. Beat on medium-high speed until medium-stiff peaks form, about 3 to 4 minutes. Stop beating once the cream holds its shape so it does not turn grainy.
Step 3: Assemble and Decorate
- Place the first sponge layer onto your serving platter. Brush the top surface generously with 3 to 4 tablespoons of the reserved cherry juice.
- Spread about one-third of the whipped cream evenly over the sponge. Scatter two-thirds of the drained cherries across the cream layer.
- Top with the second sponge layer, pressing down very gently. Brush the top with another 3 to 4 tablespoons of cherry juice.
- Frost the top and sides of the whole cake with the remaining whipped cream.
- Press chocolate shavings onto the sides of the cake. Garnish the top with the remaining cherries and extra chocolate curls.
Baker Tips for the Best Results
A few small kitchen adjustments make a huge difference in the texture and presentation of your cake:
- Chill your equipment: Place your metal mixing bowl and beaters in the freezer for 10 minutes before whipping cream. Cold tools help cream whip faster and hold its shape longer.
- Do not skip soaking the sponge: Sponge cakes are naturally lean, meaning they contain very little fat. Brushing the sponge with juice gives the classic chocolate forest cake its signature tender texture. If you love moist chocolate bakes, you can also explore our ultimate chocolate cake slice recipe.
- Make neat chocolate curls: Use a room-temperature chocolate bar and glide a standard vegetable peeler firmly along the flat side. If the curls splinter, warm the chocolate in your hands for 30 seconds.
- Allow time to rest: While tempting to eat right away, letting the assembled cake rest in the refrigerator for at least 2 hours allows the juices to hydrate the crumb evenly.
Storage and Make-Ahead Advice
Because this dessert uses real dairy cream, food safety guidelines recommend keeping it refrigerated. According to the FoodSafety.gov FoodKeeper App, fresh dairy and cream-based desserts should be kept at or below 40°F (4°C) and enjoyed within 3 to 4 days.
Store leftover cake under a cake dome or inside an airtight container in your refrigerator. Avoid using plastic wrap directly against the whipped cream, as it will stick and ruin the finish. Freezing the assembled cake is not recommended because whipped cream separates when thawed, but you can bake and freeze the plain sponge layers up to one month ahead.
Frequently Asked Questions
Can I use canned cherry pie filling instead of canned cherries?
Yes, canned cherry pie filling works well if you want a thicker, sweeter fruit layer. Simply skip making additional cherry syrup, as the filling already contains sweet gel.
What is the difference between Black Forest cake and chocolate forest cake?
They are essentially the same dessert style. The name chocolate forest cake is commonly used for modern, family-friendly versions made without traditional cherry liqueur (Kirsch).
Can I make this dessert gluten-free?
Yes. You can swap the all-purpose flour for a 1-to-1 gluten-free baking blend that contains xanthan gum. For another great wheat-free option, check out our easy GF chocolate cake recipe.
Can I use frozen cherries?
Yes, thaw frozen sweet or tart cherries completely in a colander set over a bowl. Catch the released juices to brush onto your cake layers before assembling.
Making a showstopping chocolate forest cake at home is easy when you pair a delicate cocoa sponge with light cream and juicy cherries. Slice a piece for your next family gathering or weekend treat. If you love classic chocolate layer cakes, you might also enjoy our rich German chocolate birthday cake or warm molten chocolate lava cakes.


